Don't blink, this is probably the only Williams Brothers' Boeing 247 model you'll ever see...
Kit:
Aftermarket:
Date:
Williams Brothers (72247)
Whiskey Jack decals
-
In the early 1930s, state of the art air transport meant large biplanes, built of tubular steel, wood and fabric cloth. Flying at night was still the realm of the daredevil or mail
plane pilot, and a trip across the United States was measured in days, not hours. United Airlines, one of the largest airlines in the USA contracted Boeing Aircraft to design and
build a truly modern airplane that offered passengers comfort, speed and safety. The result was the Boeing 247.
Marketed as the world’s first modern airliner, the 247 was constructed completely of metal, had an enclosed and heated cabin and cockpit, super-charged engines and controllable pitch
propellers. But it wasn’t perfect. The wing spars crossed through the cabin, causing a hazard for the unwary passenger. The first 60 planes were ear marked for Boeing affiliate
airline – Boeing Air Transport. Other airlines would have to wait to buy their new Boeings. This delay led the competition to Douglas and eventually to the legendary DC-3 and in the
end, only 75 247s were constructed.
Several 247Ds came north to serve with Canada’s small airlines. When Canada entered WW2, the RCAF was so under equipped that many civilian airplanes were impressed into service,
including seven 247Ds. During the conflict they were assigned to No. 121 (RCAF) Squadron and used as medium transports on the home front.
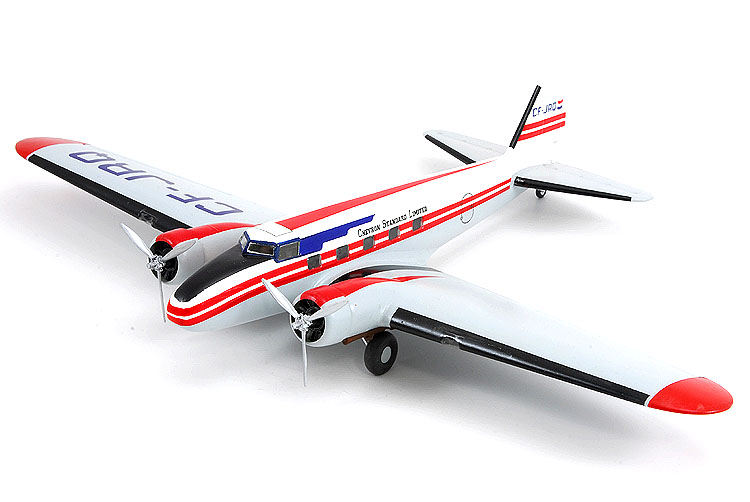
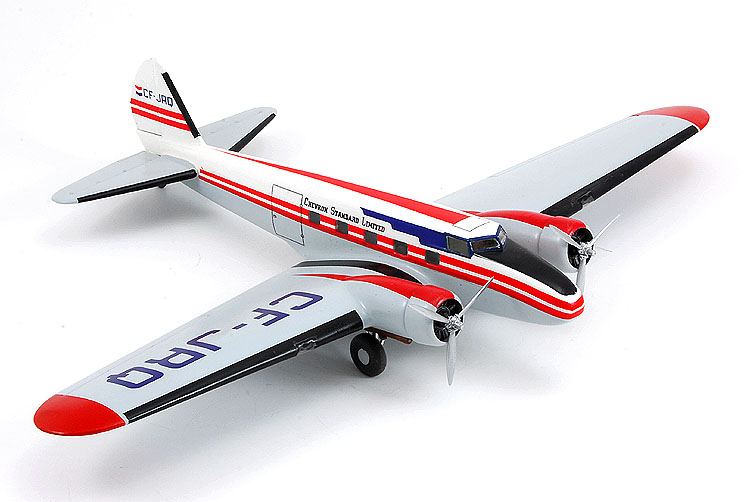
Following its military service, one 247D, CF-JRQ reentered the civil registry, flying with the California Standard Oil Company. Despite its name, this company was based out of
Calgary, Alberta. In 1967, at the end of its commercial life CF-JRQ was donated to the National Air Museum in Ottawa.
Williams Brothers’ was famous for releasing models of obscure, inter-war, often civilian aircraft. Their entire range is known for offering accurate outlines, and basic components,
but very little in the way of detail parts. This kit was no different.
Molded in light grey the basic parts were covered in extremely fine raised details. Most parts had some degree of flash along their edges. The model includes options for two
different types of windscreens, two styles of landing gear legs, and two choices of tires – plastic, or vinyl.
Decals are included for several American machines – United Airlines, and one that was used for a long-distance air race (and is now in the National Air and Space Museum).
I’ll be honest this model has taken the better part of a decade to come to fruition. Some of my memories might be a little hazy. Some of the steps might be simplified, or even missed
completely.
First – this model requires a bunch of filler. The resulting sanding also meant that much of the surface detail was lost. I quickly opted to sand all the surface detail off, keeping
the surfaces nice and smooth.
After assembly I discovered two large slots where the wings meet the nacelles. This wasn’t caused by me being over zealous with the knife, but rather the way the moulds were cut.
Filler and sanding were needed to repair this. The engines are basic, but acceptable, as were the propellers.
The fuselage was basically two halves. An interior, both for the airliner and air racer subjects is provided, but with such small windows, they’re nearly invisible. So I chose to
leave the rear cabin empty, only adding the two pilots’ chairs. The cabin entry door was glued shut, and filled smooth.
The horizontal stabilizers went together without problems, but there was a step between them and the rear fuselage sides. More putty and sanding smoothed the transition.
When I glued the major components together, I discovered that the joints would flex and break my filler. Obviously the plastic wasn’t responding well to the liquid glue I used. I
solved this by adding super glue to the joint, sanding it smooth and reapplying putty. The same went for the cabin door. There were noticeable gaps between the lower fuselage and the
wing but these were also filled. A large step on the forward joint led me to use a lot of putty to fair it into the fuselage.
Now the kit does come with a full set of transparencies but I decided that it would be easier to use Krystal Klear rather than attach the cabin windows with their friction fit. The
cockpit canopy had to be installed one half at a time then faired into the upper fuselage with putty.
Finally, after nearly a decade, several different brands of putty, super glue, sandpaper and sanding sticks, my 247 was ready for paint.
This model was bought specifically because of its Calgary connection, and at the time I purchased it I was looking at making the markings myself. At least time was on my side as
Whiskey Jack released a set of ALPS printed decals several years ago.
I started by painting the whole model with Testor’s flat white. Rather than spend hours trying to get a nice opaque finish with my airbrush, I grabbed a spray can and used that. I
followed by masking off the upper fuselage and air brushing the rest of the model with Model Masters’ Light Ghost Grey. Detail items, like the wheels and engines were hand painted
with Polly Scale acrylics.
The decals went on with no troubles, responding well to my Gunze Mr. Marksofter setting solution. Using my computer, decal paper and a photocopier, I created decals for the cabin,
baggage and overhead emergency hatch.
I’ll admit it, I’m not the fastest builder and I’m prone to deserting a project when something flashier comes along. I think it was a combination of this, plus the repetitive filling
and sanding, filling and sanding that made me keeping dropping this model back in its box. There was absolutely nothing complicated about the model but my motivation was obviously
taxed by the need to tweak all the components.