Kit:
Aftermarket:
Date:
Tamiya
Heritage Aviation resin conversion and Mike Grant custom decals
2007
Everybody knows about the North American P-51 Mustang and its long and distinguished history. Fewer people are aware that people tried to bring the Mustang back into production in
the late 1960s.
Cavalier Aviation (of Florida) began modifying P-51Ds for a variety of customers after the Korean War. Many were built into civilian 'toys' while still more were rebuilt for the
foreign Military Assistance Program, or MAP. Stocks of P-51s were rebuilt in the United States and supplied by the government to friendly third-world countries needing arms to
resist communist uprising. Several of these countries included Boliva, Salvador and the Dominican Republic.
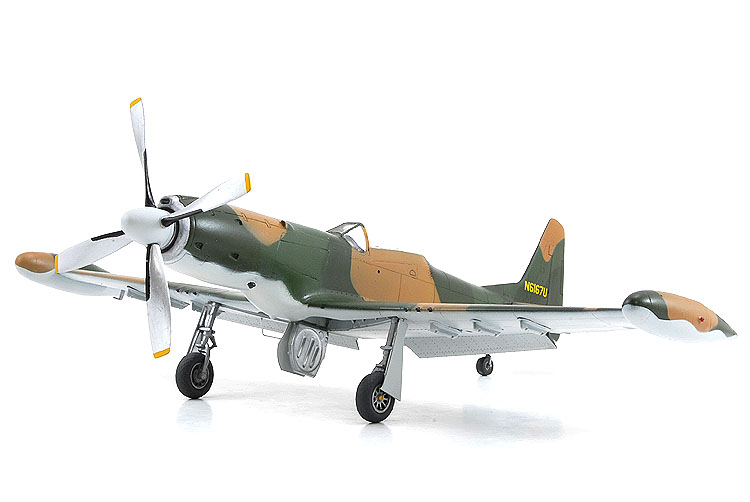
In 1968, Cavalier mounted a 1740 eshp Rolls-Royce Dart 510 turboprop onto a P-51D airframe and flight-tested it as the Turbo Mustang III. Although the tip tanks, under wing hard
points, fin extension and second seat were standard items with Cavalier's Merlin-powered Mustang II, the bulbous cowling and missing belly radiator were noticeable changes.
Depending on the reference source, there was either one or two Turbo Mustangs converted by Cavalier. One apparently crashed into the Gulf of Mexico while another source claimed the
plane was sold to Salvador. I only discovered one photo of the Cavalier machine on the Internet.
Several years ago, this conversion was offered to members of IPMS United Kingdom. Luckily for my brother and I, we managed to convince Mike Grant to pick up several sets while he
was overseas. This conversion set is now available through Heritage Aviation.
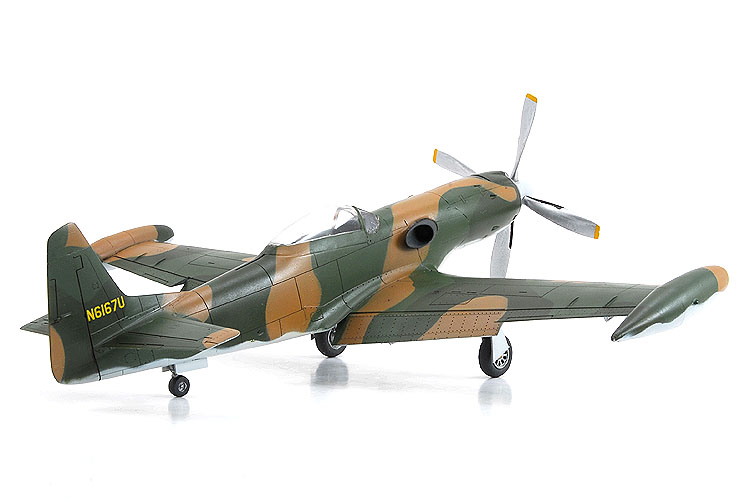
This was a nicely done set that included a fuselage plug, Dart engine, propeller, fin extension, hard points and vacuformed canopies. Molded in a light grey resin my only problem
was the wide, trench-like panel lines on the engine. However in the instructions, the set's creator explains why this happened.
After taping the fuselage together, I removed the Merlin engine along the firewall panel line and test fit the Dart engine piece to make sure it fit. I then sawed off the belly
scoop so there was a straight line from the wing to the tail wheel. I then added the front seat from Tamiya's cockpit, painted the interior and glued the fuselage and resin pieces
together.
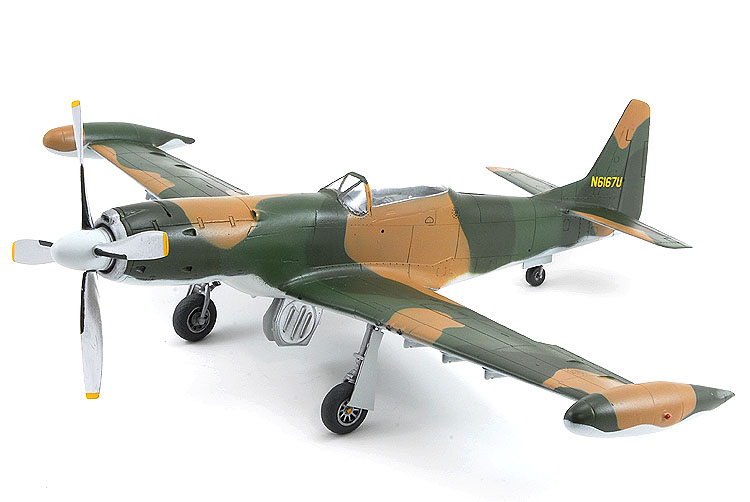
The wings were assembled per the kit's instructions, but I added the resin hard points at 15 and 30mm outboard of the original pylon's location. The pitot tube was also moved 19mm
outboard and the tip tanks glued into place. There was a need to do some minor filling and sanding around the joint and to form more of a point on the end of the tip tanks.
Finally, I added the fin extension, which simply required a few swipes with a saw and a touch of liquid putty.
To prepare the model for paint, I needed a lot of work puttying and sanding the joint between the engine nacelle and the fuselage. It's almost as if the engine was a little too
narrow. But with time I managed a smooth transition.
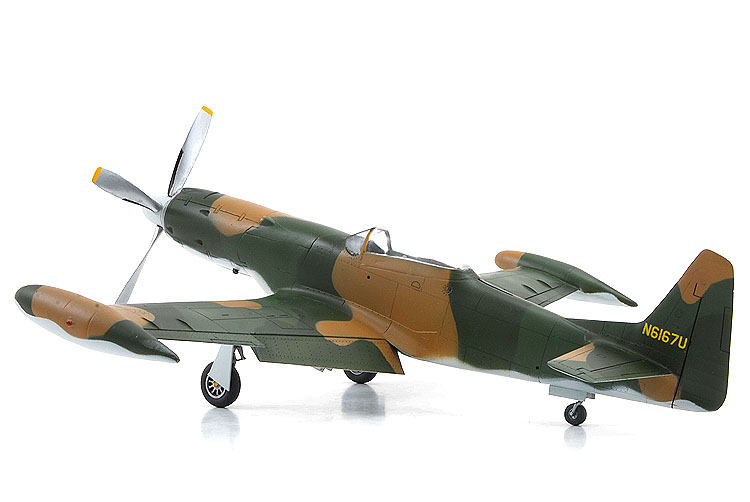
I mentioned that I'd only found one really poor black and white picture on the Internet of this machine, so unfortunately I had to rely completely on the kit's hand drawn paint
guide. I think the pattern turned out okay and it looks like it was based on the Merlin-powered Mustang II scheme.
I used Polly Scale and Model Master acrylic paints for the exterior, airbrushed over masks cut from photocopier paper. The colours were the same as the USAF's Vietnam era colours.
Future floor wax gave the model its shine and Mike Grant made up the registration decals for the tail.
This certainly is an interesting subject when its finished and modelers who knew I was working on it still keep asking me what it is.