Can you turn that colour down?
Kit:
Aftermarket:
Date:
Promodeler
None
2006
Overshadowed by its younger brother, North American Aviation’s F-86D Sabre was developed to meet the needs of the USAF for an all-weather interceptor. Like many of its contemporaries
(B-36, F-89 and F-94), the Sabre Dog was faded to obscurity because it served between the Korean and Vietnam Wars. None the less, it was an important aircraft, being the first USAF
with all-rocket armament, and the first all-weather interceptor with only one person to fly and operate the radar fire control system.
In all, 2, 506 F-86Ds were built by North American. Most served only with the USAF or National Guard, but a small number were exported to Denmark, Japan, Korea, Taiwan, Philippines,
Greece, Turkey and Yugoslavia.
In the same way that the real F-86D was overlooked, modelers too have had this important variant of the Sabre poorly represented for years. Lindberg offered a kit back in the 1950s,
which came with a battery powered ‘jet-engine’ noise maker. I believe that Collectaire also offered a very expensive resin kit. Maybe it was the lack of non-natural metal finishes
that scared modelers away.
When I bought this kit I did it for one reason – to improve my skills with a natural metal finish.
As with most of my models, this one started in the cockpit. Unlike the other Sabre kits I’d built, this one had lots of parts. There was a fine framework behind the pilot’s seat that
had to be carefully cleaned and assembled. The instrument panel had lots of tiny pieces representing parts from the radar unit. If you’re not careful like me, its easy to leave some
of them out.
Assembling the rest of the model didn’t present trouble. In fact, compared to conventional F-86s, there’s plenty of room in the nose for weight and I took advantage of it. The only
area I had difficulty with was keeping the pitot tube and slat tracks from breaking.
Like all natural metal finishes it’s the preparation that will make or break a model. My goal for this model was to try Alclad II paints for the very first time. I read the
instructions, read even more on the internet, and then started painting. I primed the model with Tamiya gloss black from a spray can, but dust and paint buildup meant that I needed
to polish this backup. Then I started hearing that I might have used the wrong paint as a primer. Since Alclad II cracks under those circumstances, I wasn’t going to risk it.
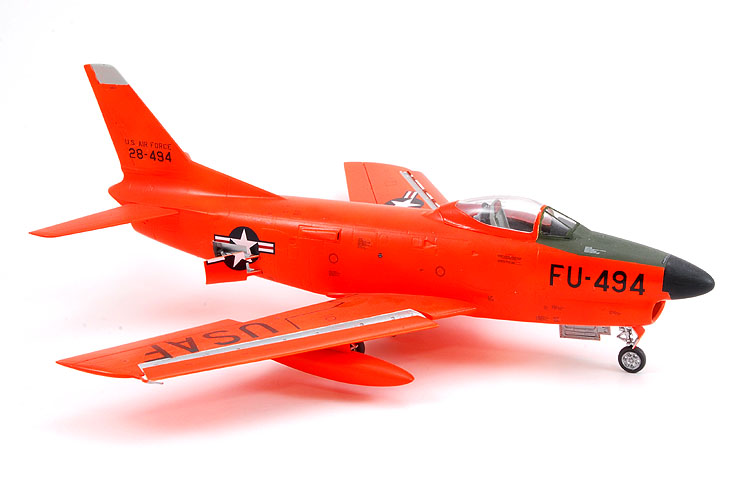
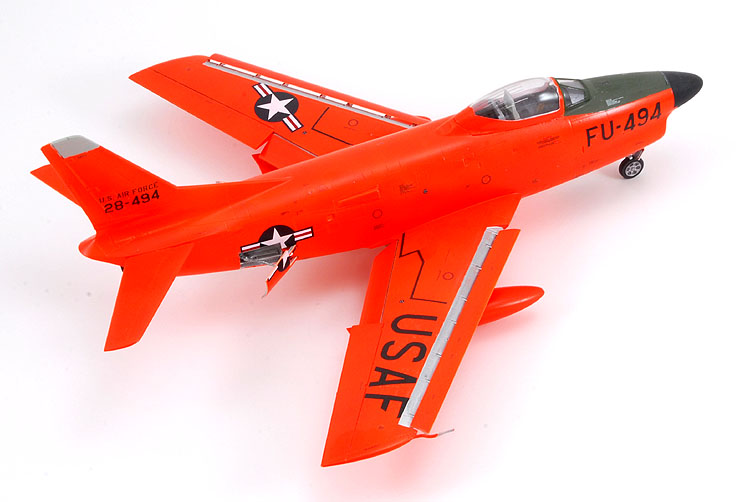
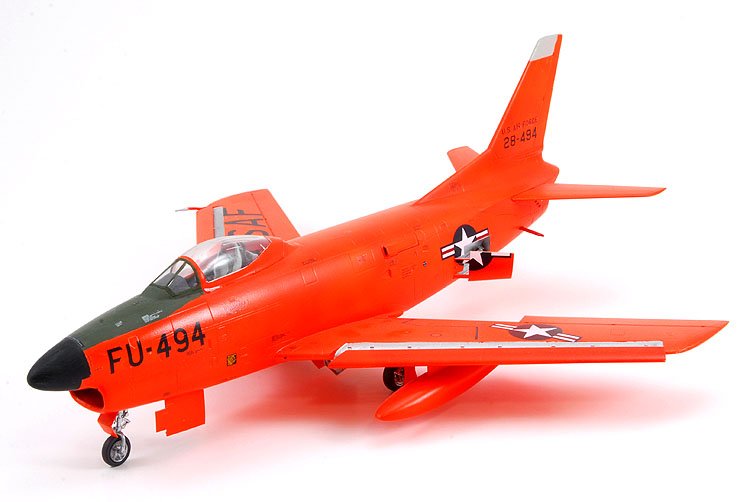
Instead, I found a picture of a much more eye-catching plane. For some reason, this F-86D was painted all fluorescent red. Maybe it was for research, or for a record attempt, I don’t
know. But boy would it be loud.
Away went the Tamiya black, and out came the Testors flat white. Everything was then covered with Model Master II fluorescent orange. Boy now that looked bright.
Almost all of the decals came from the Promodeler decal sheet. In fact, I spent about five or six hours putting on the stencils and there’s still a couple dozen that I left off. The
serial number for the nose was pieced together from the kit’s decals, while the tail code came from Hasegawa’s F-104J. Apparently it should read 50-494 not 28-494, but that’s what I
get for trusting other people’s research.