Kit:
Aftermarket:
Date:
Hasegawa
Aeromaster decals (SP48-05)
2001
What's there to say about the Me109? Designed and built in the mid-1930s the Bf 109 was the most advanced fighter plane at the time. Unlike its western counterparts, the Bf 109 was
an all metal monoplane that featured retractable landing gear and fully enclosed cockpit. How modern was it? Well compared to the British Gloster Gladiator biplane and American P-36
the Messerschmitt would have the same technological advance as a F-15 Eagle in the Korean War.
When Hitler began his planned invasion of England in 1940 it fell to the Luftwaffe to crush the English's fighting spirit. Day after day, night after night, the bombers and fighters
of the Luftwaffe attacked targets in Southern England, bringing the Royal Air Force to the brink of destruction. That is until Hitler made a crucial mistake. Rather than continue
bombing the airfields that held the few RAF fighters, he ordered the bombers to focus on destroying London. A tactical change that allowed the RAF time to repair their airstrips,
fix their broken planes and rest their tired crews.
Several years ago, Aeromaster released a large set of decals for the Battle of Britain. Since I wanted to model Calgarian Willie McKnight's Hurricane (contained on the sheet) I
bought the set. I now had decals for about thirty BoB aircraft. One set went to a Hawker Hurricane (see my article) while I saved the McKnight markings for another. But what to do
about the twenty-some other decal sets? One day I stumbled across a Hasegawa 109E-3 in a local hobby shop for $20. Why? Maybe it was the unpopular Romanian decals that caused it to
be ignored for so long.
The entire kit meets the modern standards of Hasegawa. Most likely because the Bf 109s set the company's standards when they were released. Medium grey plastic, finely recessed
panel lines and tight fitting parts. Not that the kit was flawless, I did need some minor putty.
I followed the instructions and experienced no problems, however I didn't use the photo-etched fret that was included, mainly because I want to keep my models simple. As I mentioned
I did need some filler. Liquid putty was used on the upper cowling to fuselage joint and Squadron white putty was used on the joint between lower wing and lower fuselage. After all
my careful seam work, I needed to go back and scribe a line along the rear fuselage's centerline. This was a physical joint where the two halves were fastened together.
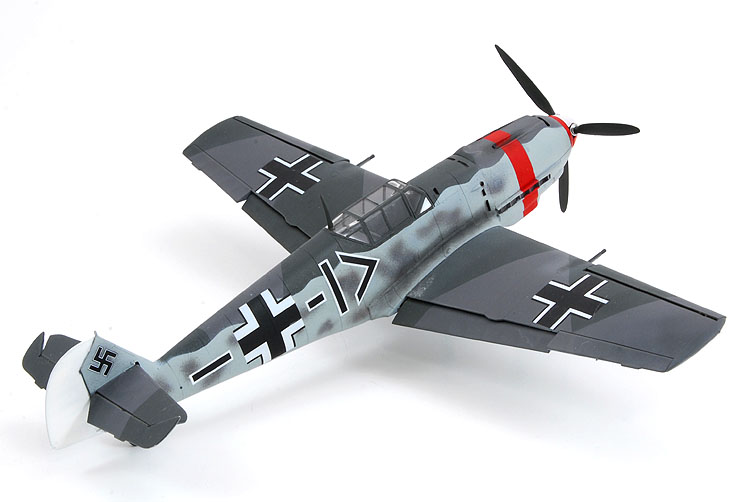
I used the Aeromaster decal sheet, and painted my Bf 109 in a standard RLM 74/75/76 scheme. However some colour was added with a white rudder, red stripe on the cowling and a red
and white spinner. The Aeromaster decals went on without any trouble and without silvering using Gunze's Mr. Marksofter.
While I'm not a big fan of German aircraft, Hasegawa's Bf 109 kits have proven themselves as constant sellers. Affordable, high quality and a wide assortment of markings available
means that modelers can choose to build one, or a hundred Messerschmitts.