
Kit:
Aftermarket:
Date:
Hasegawa
None
2003
I’ve always liked the Grumman Cats; the Wildcat, Hellcat, Bearcat, Tiger, Cougar, Panther, Tomcat and probably a few more I’ve forgotten. Despite my interest, I’ve rarely built a
model of any of these planes, usually because of one major problem – I don’t like their paint schemes. Blue this, grey that, my display case is more than full of these colours, and
I don’t want more.
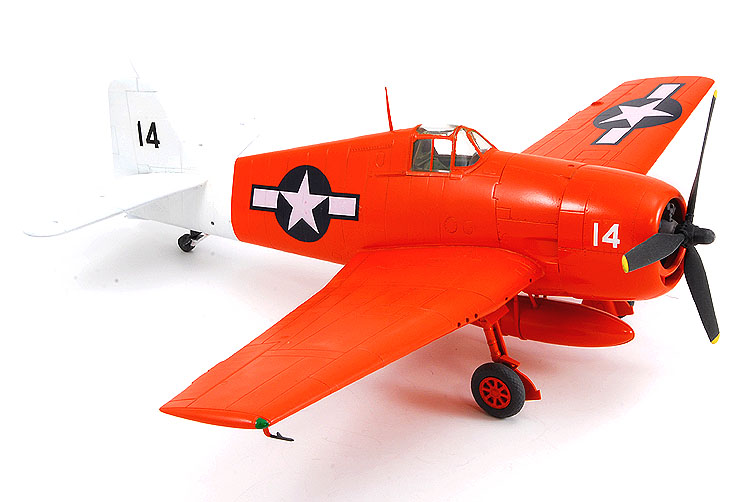
Fast forward to November 2002 and a posting on aircraftresourcecenter.com. A modeler had just finished a Hellcat in the colours of a Navy drone from 1946. It was international
orange with white tail surfaces – truly a scheme to brighten any collection.
In 1946 the US government began a series of atomic tests in the South Pacific, specifically on the Bikini Atoll of the Marshall Islands. Two tests were carried out; ‘ABLE’ and
‘BAKER’ using bombs similar to the Fat Man dropped on Nagasaki the previous year. ‘ABLE’ was air dropped while ‘BAKER’ was detonated below the lagoon’s surface. As part of the
scientific study both the US Army and US Navy flew manned and unmanned aircraft throughout the tests with the unmanned drones carrying out the more hazardous missions – including
flying into the mushroom cloud.
A local hobby shop was selling a bunch of Hasegawa and Tamiya kits at about 30 to 40% off (aren’t discount bins great?), so I picked up the Hasegawa F5F-5 Hellcat and immediately
set to work. Overall the Hellcat matches most of Hasegawa’s other releases, medium grey plastic, fine engraved panel lines and reasonably decent fit. As I studied the kit I
concluded construction shouldn’t pose a problem.
I started by assembling most of the cockpit, leaving the instrument panel and side consoles off until I’d painted the rest interior green. I’m content with the way the interior
looks, there is room for improvement but I kept my canopy closed. The fuselage and wings fit reasonably well, I did need some liquid putty to all the seams and smooth them with a
sanding stick. The worst fit occurred when I glued the wing and the fuselage together. A fine bead of Squadron white putty had to be applied around the upper joints, which a good
portion of liquid and Squadron putties were needed on the aft, lower joint. There were no surprises or difficult areas as I continued to build the Hellcat. I installed the canopy,
tails and landing gear before painting.
I sprayed the tail sections with Model Master’s flat white enamel, allowed it to dry and masked. I then airbrushed the rest of the model, including the landing gear and wheel bays
with Model Master’s International Orange.
Markings for the Operation Crossroads Hellcat came from the spares box. Aeromaster US insignia and some generic numbers, nothing fancy.