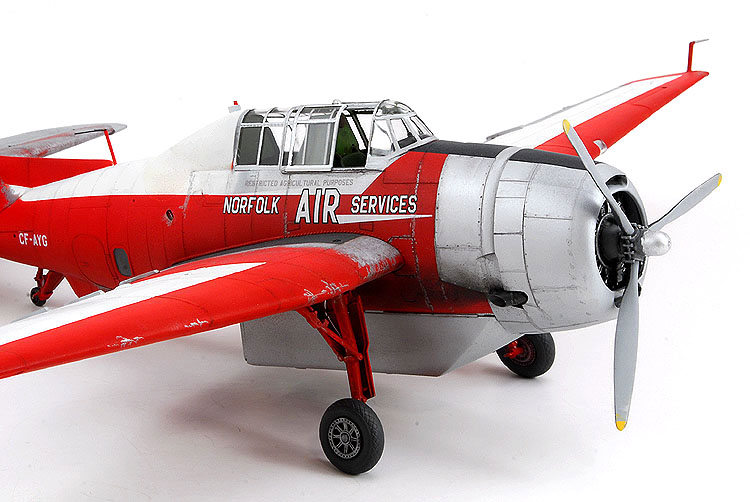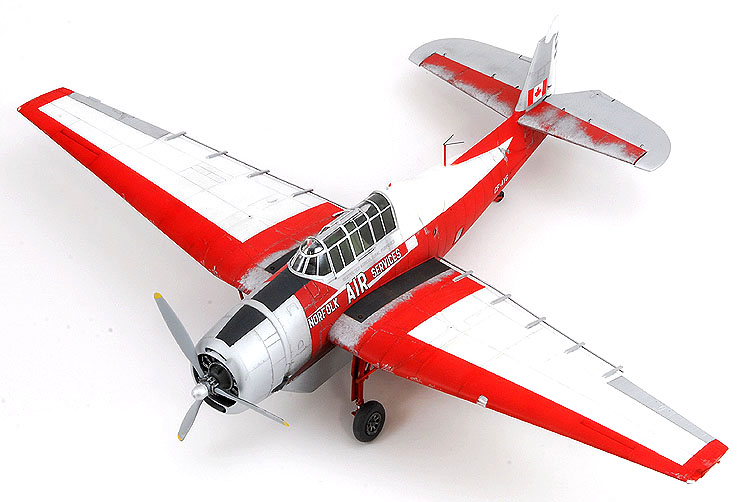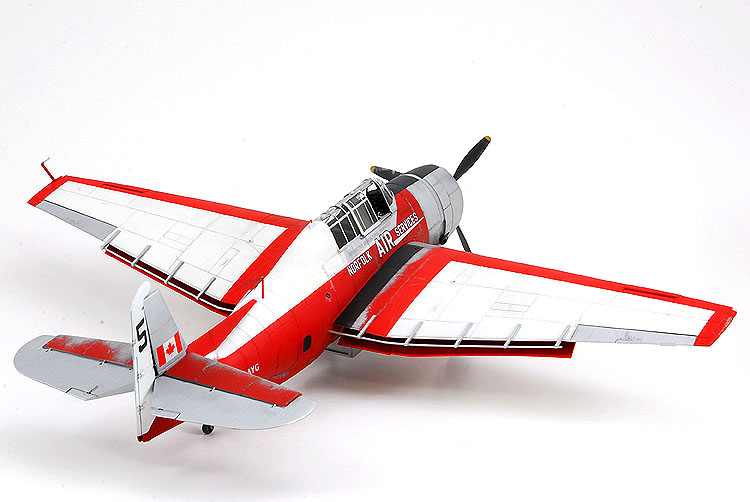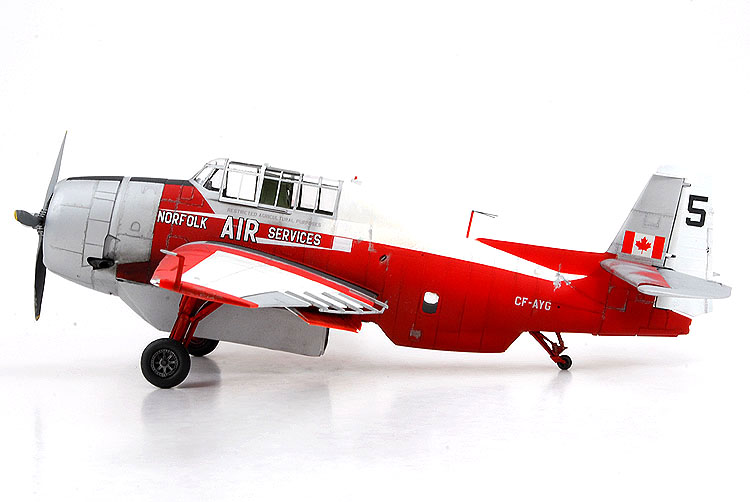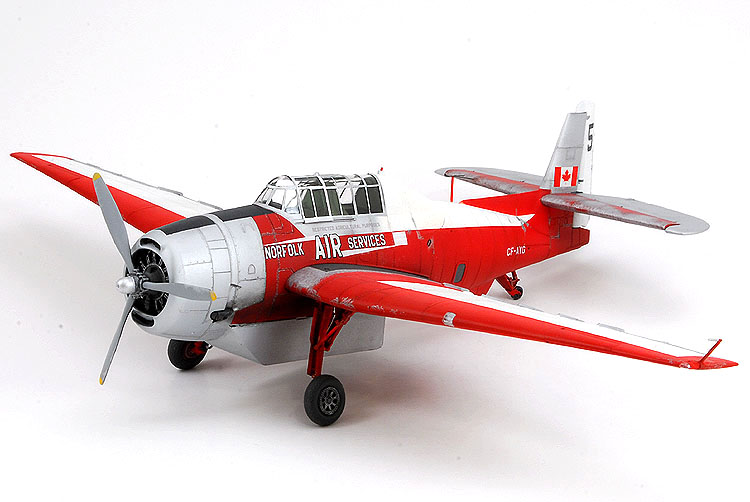
Civilian airplanes might not be your thing, but this is one Avenger that's guarenteed to draw your attention away from all those blue Navy models. With a slightly modified aftermarket conversion and some simple scratch building, I turned my torpedo bomber into a bug killer.
Kit:
Aftermarket:
Date:
Accurate Miniatures (480121)
Lone Star Models TBM conversion (48356) and Mike Grant custom decals
2010
Sometimes I’ll find a photograph that has an immediate effect on me and I’ll end up inspired enough to build a model. That was the case when I received a picture of a Grumman
Avenger spray plane. Apparently the pilot had simply used up too much runway on landing and, approaching the end of the runway, locked up the brakes and put his plane up on its
nose. Seeing the opportunity to show a perfect 3-point landing, I set off to build my model.
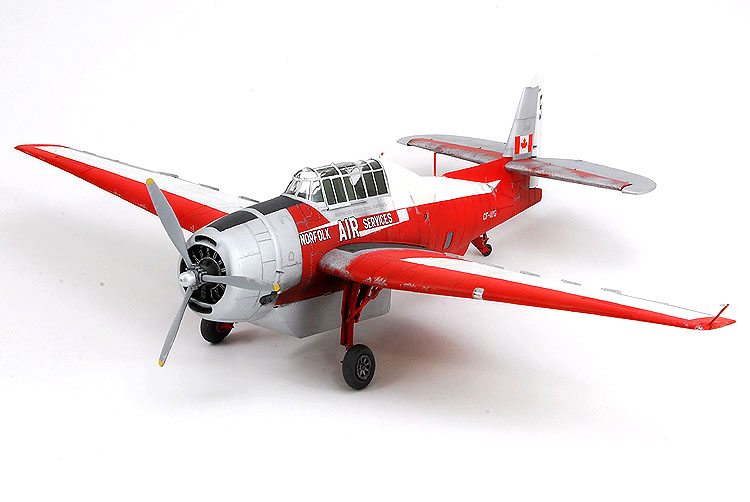
The kit I started with was Accurate Miniatures’ TBM-3, which is as close to a perfect model as the industry has come. Parts are molded in medium grey styrene, panel lines are
nicely recessed, and the fit is near perfect. Unfortunately, this project was on hold for several years so some of the early details are forgotten.
Construction of the interior was rather simple, with dry brushing and washes used to bring out the details on the kit’s parts. I didn’t install the rear turret or any of the
items in the radioman’s compartment since these were removed on civilian spray planes.
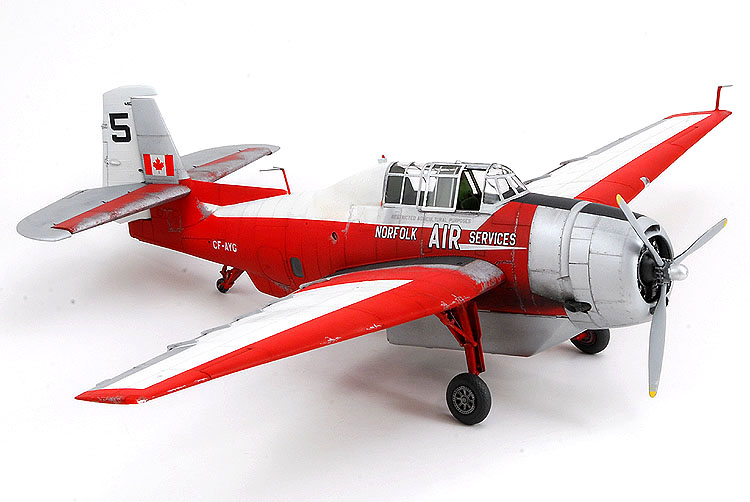
The most labour intensive part of this project was building the chemical tank and gun turret fairing from scratch. I started with the tank by looking at my photograph to see if
this was a slab-sided or rounded tank. When people were making these tanks in real life, they did whatever they wanted. So far, I’ve seen about a dozen variations. Luckily
this one was a slab-sided tank.
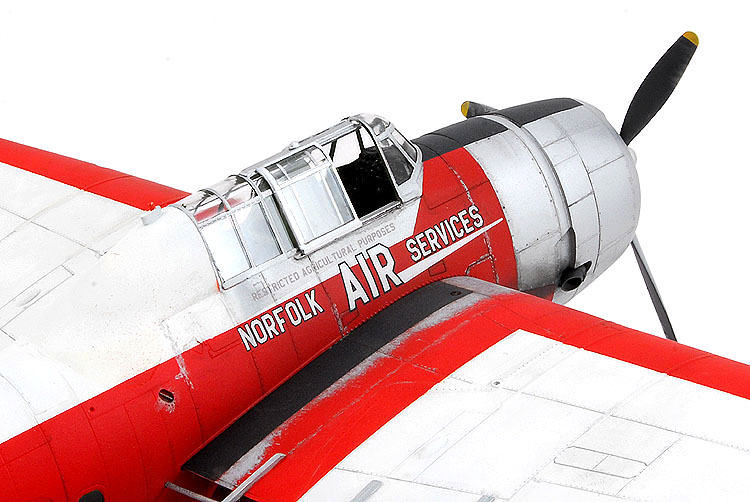
That meant I could use a Lone Star Models’ resin TBM Avenger fire bomber conversions. Although it’s not an exact match for the Canadian sprayer I was replicating, it was close
enough. On my airplane the rear fairing was not installed, so I cut off the back of the resin tank and added a couple plastic ‘greebles’ to busy the blank surface up a bit. I was
also able to use the Lone Star rear canopy but I sanded the curvature out of it because my plane appeared to have modified with little more than a piece of bent sheet metal.
More bits of styrene created the rotating beacon and the antenna mast.
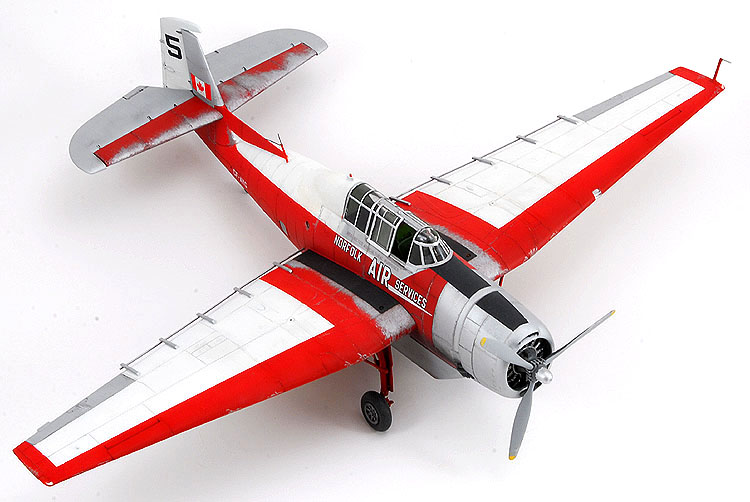
The wings and tails were simple, although cut the flaps off the model and positioned them down. I also scored the elevators along their hinge lines and bent them. The spray booms
were made using lengths of styrene square-stock and rod dug out of my spares box. No drawings exist to show were things go, so I did my best to match my reference photo.
Agricultural spray planes were typically ridden hard and put away wet (as the saying goes), and this was certainly reflected in the general condition of the plane’s paintwork.
The basic colours are Tamiya acrylics, with a bunch of Polly Scale used for smaller areas. The heavily chipped finish was replicated with dry brushing and silver pencil crayon,
again using my reference photo as a guide. It looks uneven but that’s the way it was.
With only two days before this model was due on the contest table, I begged Mike Grant to do some decals for me, and he came through with time to spare. He’s been an awesome help
to me and my one-of projects for years.
From the moment I started this project my plan was to put this model up on its nose – just like in my photograph. To date, I haven’t gotten around to finishing the base, so it
continues to sit on its wheels. Despite not being the finished product I envision, I am happy with this model and how it turned out. Especially since I finished it before
contest day - 11:35pm might be late, but it is before midnight.